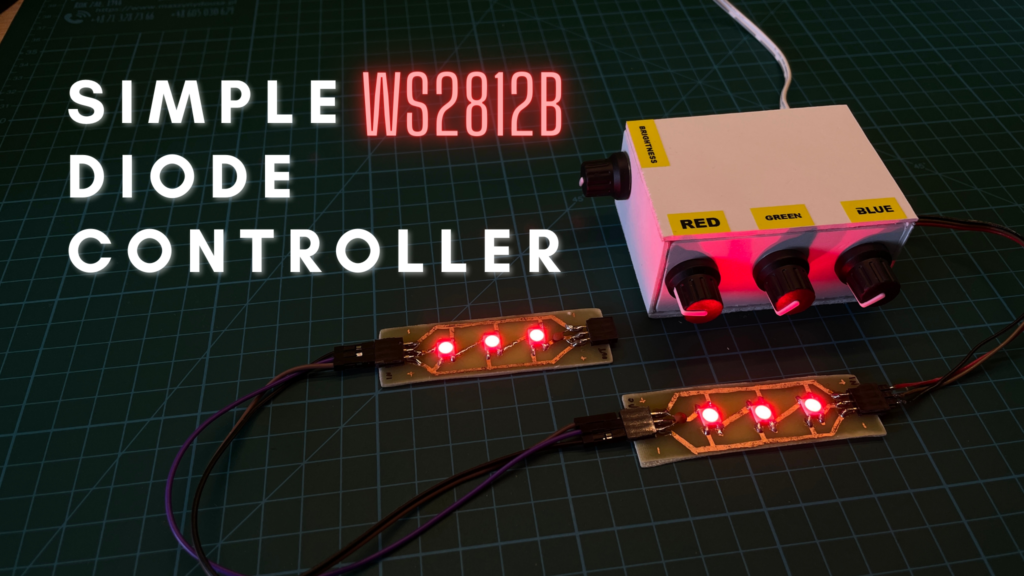
Recently, I have been trying my hand at a bit more professional electronics photography. When taking pictures, I tried to force a particular type of lighting with several panels of WS2812B LEDs, controlled by Arduino. However, constantly changing the code is quite tiresome, so I built a simple device to control this type of LEDs.
The premise was simple, I don’t want to constantly change the code, so I need something that can control the brightness and each color separately. For this task I decided to use a set of potentiometers connected to a microcontroller. It is the processor that will convert the voltage from the potentiometers into specific digital values, sent further to the WS2812B addressable LEDs.

The design is based on an AVR microcontroller, I just chose an ATmega328, because I have several such chips in my inventory. Connected to its four analog inputs are potentiometers that control, in turn, the colors red, green, blue and the brightness of the LEDs themselves. The WS2812Bs are connected to an outboard goldpin socket, the control signal itself appears at the PD6 (D6) output of the microcontroller. The whole is powered by 12V, which is reduced to 5V by a small inverter – MH-mini-360. In addition to this, the design still includes power supply filter capacitors and a single resistor connected to the RESET input of the processor. A quartz resonator did not appear in the project, as the ATmega runs on an internal clock with a frequency of 8MHz.
#include <Arduino.h>
#include <Adafruit_NeoPixel.h>

#define PIN 6

#define NUMPIXELS 30

Adafruit_NeoPixel pixels(NUMPIXELS, PIN, NEO_GRB + NEO_KHZ800);

int v_red;
int v_green;
int v_blue;
int v_bri;

void setup() {
  pinMode(A0,INPUT);
  pinMode(A1,INPUT);
  pinMode(A2,INPUT);
  pinMode(A3,INPUT);

  pixels.begin();
}

void loop() {
  v_red=map(analogRead(A0),0,1023,0,255);
  v_green=map(analogRead(A1),0,1023,0,255);
  v_blue=map(analogRead(A2),0,1023,0,255);
  v_bri=map(analogRead(A3),0,1023,0,255);

  pixels.setBrightness(v_bri);

  for(int i=0; i<NUMPIXELS; i++) {
    pixels.setPixelColor(i, pixels.Color(v_red,v_green,v_blue));
    pixels.show();
  }
}
I prepared the code that will execute the processor in Arduino, or more precisely in Visual Studio Code, by which you can see the included Arduino.h library at the very beginning. In addition, the Adafruit_NeoPixel.h library is included to facilitate the operation of the WS2812B LEDs.
At the beginning of the code we declare the data pin for the diodes and their number. It is worth knowing that the declared number of diodes can be greater than the number of diodes physically connected. That’s why I declared that I will use 30 diodes, even though I am actually connecting only a dozen of them. The next instructions initialize the WS2812B and generate four int variables where I will store the numeric color and brightness values. The setup loop contains only the declaration of the potentiometer inputs and the function that starts the LEDs. All the control is sewn into a loop. We can divide it into actually two parts. In the first, thanks to the map function, we assign to a variable the value read from the analog input and rearranged, so that it is understandable, for the WS2812B. Simply put, the potentiometer returns us a value in the range from 0 to 1023, and the map function rewrites it to a range from 0 to 255. Next, we set the brightness of the entire led bar. Since the color of each led has to be driven separately, I used a for loop associated with the NUMPIXELS variable to do this.

I built the device on the basis of an ordinary universal board. The processor was placed in a dedicated socket, and the potentiometers were soldered directly. You can also see one of the capacitors, the power connector and the control connector to which the diodes will be connected.

The remaining two capacitors, a resistor and an inverter were surface-mounted to the board. In addition, there were, of course, tracks connecting all the components on the bottom.

In order to add any variety to my design, I decided to enclose it in a small enclosure, quickly made of foamed PVC. In addition, the potentiometers gained knobs and stickers with descriptions.
As you can see in the video above, the device works very well. Each color can be controlled separately, besides, a separate potentiometer controls the brightness of all LEDs. I think that such a design is perfect for people who need to change the brightness settings of the LEDs quite often and quickly. First of all, such a solution is faster than controlling the leds from, for example, a mobile app.
Sources:
- https://github.com/adafruit/Adafruit_NeoPixel
- https://cdn-shop.adafruit.com/datasheets/WS2812B.pdf
