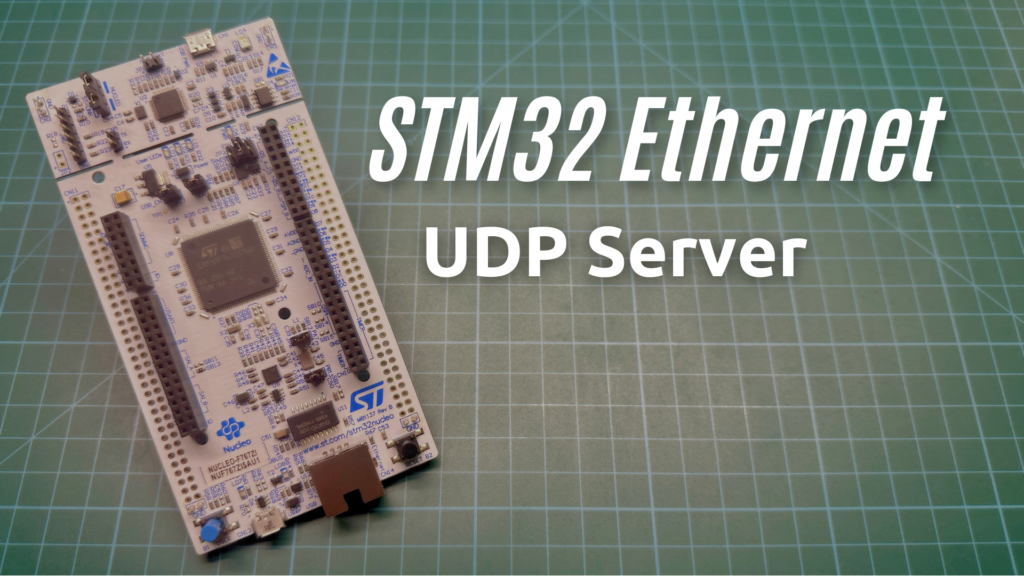
Recently I had the opportunity to work on some project using STM32 microcontroller and Ethernet interface. Probably like other people undertaking this topic, I encountered a problem – the lack of “simple” tutorials. In most of the available sources, connecting the Ethernet interface and STM32 chips is described quite confusingly, and in my opinion, there is a lack of instructions describing how to configure this functionality in the simplest possible way, without unnecessary exploration of network aspects. That’s why I decided to prepare this and related material covering the topic of Ethernet on STM32. In this article I will show you the basic functionality of the UDP server.
In the projects I use the Nucleo F767ZI board, the codes are available for download on my GitHub profile.
Warning of new firmware version

When preparing the codes for this tutorial, I used CubeMX V6.12.1. If anyone wants to use the finished project that I provide on my GitHub profile, they will probably encounter a warning about the new firmware version. In that case, I recommend going ahead and using version 6.12.1.
Project configuration
When preparing a UDP server project, use the configuration described in the first article. It is identical and consists in selecting the RMII option for the Ethernet interface and the corresponding driver and IP address in the LWIP section.
Przygotowanie biblioteki UDP Server
udp_server.h
#ifndef INC_UDP_SERVER_H_
#define INC_UDP_SERVER_H_

void udpServer_init(void);

#endif
The construction of the udp_server.h header file is extremely simple and contains only the prototype of the initialization function.
udp_server.c
#include "lwip/pbuf.h"  // Provides structures and functions for packet buffers.
#include "lwip/udp.h"   // Includes UDP-specific functionality.
#include "lwip/tcp.h"   // Used for TCP/IP stack functionality (though not required for UDP operations).

#include "stdio.h"      // Standard input/output library.
#include "udp_server.h"  // Custom header file for this server (likely contains function prototypes).

// Callback function declaration.
void udp_receive_callback(void *arg, struct udp_pcb *upcb, struct pbuf *p, const ip_addr_t *addr, u16_t port);
At the beginning of the udp_server.c file we include header files embedded in the lwip library related to the functioning of the Ethernet interface. In addition, we declare the standard library stdio.h and the header file created earlier.
This section also contains a prototype of the udp_revieve_callback function, which will be run when a connection to the STM32 module is established.
void udpServer_init(void)
{
    // UDP Control Block structure
    struct udp_pcb *upcb;
    err_t err;

    /* 1. Create a new UDP control block */
    upcb = udp_new();

    /* 2. Bind the upcb to the local port */
    ip_addr_t myIPADDR; // Define the IP address for the server.
    IP_ADDR4(&myIPADDR, 192, 168, 8, 200); // Set IP to 192.168.8.200

    // Bind the UDP control block to the IP and port 1100.
    err = udp_bind(upcb, &myIPADDR, 1100);

    /* 3. Set a receive callback for the upcb */
    if (err == ERR_OK)
    {
        // Register the callback function for receiving data.
        udp_recv(upcb, udp_receive_callback, NULL);
    }
    else
    {
        // If binding fails, remove the UDP control block.
        udp_remove(upcb);
    }
}
The initialize function creates the udp_pcb structure for the UDP server. The code includes the IP address that is assigned to the STM32 module and the port that will be used to exchange data. Here is also a reference to udp_recieve_callback, which is the function whose task will be to handle incoming data.
void udp_receive_callback(void *arg, struct udp_pcb *upcb, struct pbuf *p, const ip_addr_t *addr, u16_t port)
{
    struct pbuf *txBuf; // Packet buffer for transmitting data.

    /* Get the IP of the Client */
    char *remoteIP = ipaddr_ntoa(addr); // Convert client IP address to a readable string.

    char response[100];

    // Determine the response based on the received payload
    if (strncmp((char *)p->payload, "UDP00", 5) == 0)
    {
        sprintf(response, "Hello World\n");
    }
    else if (strncmp((char *)p->payload, "UDP01", 5) == 0)
    {
        sprintf(response, "RafalBartoszak\n");
    }
    else
    {
        sprintf(response, "ERR\n");
    }

    int len = strlen(response);

    /* Allocate a pbuf for the outgoing message from RAM */
    txBuf = pbuf_alloc(PBUF_TRANSPORT, len, PBUF_RAM);

    /* Copy the response message into the buffer */
    pbuf_take(txBuf, response, len);

    /* Connect to the remote client */
    udp_connect(upcb, addr, port);

    /* Send a reply to the client */
    udp_send(upcb, txBuf);

    /* Disconnect the UDP connection to allow new clients */
    udp_disconnect(upcb);

    /* Free the transmit buffer */
    pbuf_free(txBuf);

    /* Free the receive buffer */
    pbuf_free(p);
}
udp_recieve_callback is a callback function (callback), called automatically by the lwIP stack when the UDP server receives a data packet from the client. It expects several arguments to be passed: arg – an additional argument passed by udp_recv() – not used here, upcb – a pointer to the UDP control – represents the server connection, p – a buffer containing the data received from the client, addr – the IP address of the client that sent the data, and port – the port number from which the client sent the data.
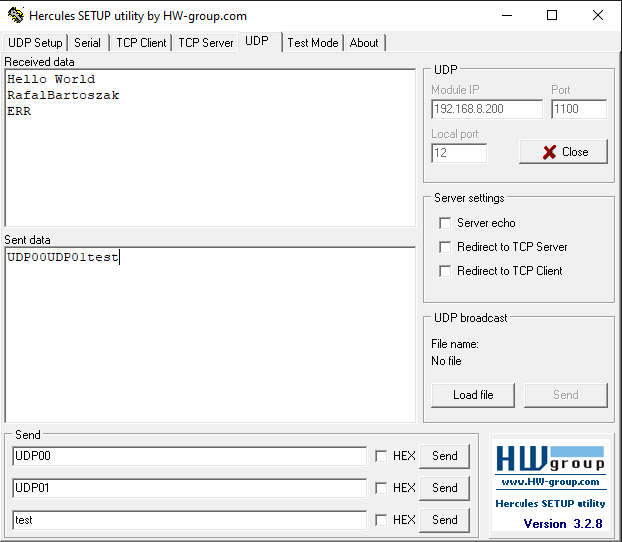
In the first step, the appropriate variables and structures used in the body of the function are created. Then, thanks to conditional functions, we can react to the received data and prepare a response variable storing the text to be sent back. In the code you will find a simple handling of two commands UDP00 – Hello World response, UDP01 – RafalBartoszak response. For any other data, the server will send back an ERR code.
The last step is the appropriate allocation of the response variable and start a temporary connection, during which the data will be sent to the client. At the end, an additional memory release is placed.
Main program code
/* Private user code ---------------------------------------------------------*/
/* USER CODE BEGIN 0 */
extern struct netif gnetif;
/* USER CODE END 0 */
In the main.c file, which contains the main program executed by the STM32, we include a netif structure declaration named gnetif. This is a basic structure defined in the built-in LwIP (Lightweight IP) library that handles the network stack.
/* USER CODE BEGIN 2 */
  udpServer_init();
  /* USER CODE END 2 */

  /* Infinite loop */
  /* USER CODE BEGIN WHILE */
  while (1)
  {
    /* USER CODE END WHILE */

    /* USER CODE BEGIN 3 */
	  ethernetif_input(&gnetif);
	  sys_check_timeouts();
  }
  /* USER CODE END 3 */
In the main while loop we place the instructions ethernetif_input(&gnetif); and sys_check_timeouts();. Their task is to sequentially receive all the data from the Ethernet port and assign it to the network stack, in other words, pass it to the gnetif structure to which the pointer is placed in the argument. The second command checks and handles all the timeouts associated with the LwIP stack. In addition, above the while loop there was a function that initializes the UDP server.
The program prepared in this way should be saved in the microcontroller’s memory, remembering to connect the Ethernet cable to the board beforehand. Although by doing it later, nothing bad will happen.
Launching

To test the code’s operation I used the Hercules program, available for free on the Internet. From its level, specifically the UDP tab, we can connect to any such server. By entering the appropriate IP and Port, such as we set in the code for the STM32, we can establish a connection with the microcontroller. At the bottom of the window you can see three spaces for data to be sent. As you can see, I sent UDP00, UDP01 and test in sequence. The microcontroller’s responses can be seen above and follow the described code.
As you can see, the implementation of the UDP server in the STM32 is quite simple. In the next tutorial we will reverse the roles and it will be from the microcontroller that we will connect to another UDP server.


